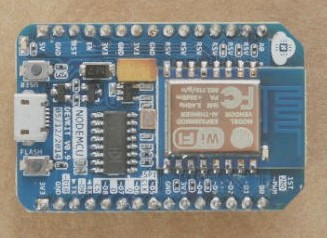
A friend from work let me borrow an ESP8266 module on a NodeMCU board and I went about trying to get started with it and thought I’d write up my notes. (using C++)
To make this easier I’m going to use the easily available Arduino IDE and a set of libraries for the ESP8266 module.
Install Arduino IDE
Add libraries
Using these libraries you can follow the steps below to enable your Arduino IDE to work with many ESP8266 modules. https://github.com/esp8266/Arduino
Using the Arduino IDE Boards Manager:
- Start Arduino and open Preferences window.
- Enter http://arduino.esp8266.com/stable/package_esp8266com_index.json into Additional Board Manager URLs field. You can add multiple URLs, separating them with commas.
- Open Boards Manager from Tools > Board menu and install esp8266 platform.
- Select your ESP8266 board from Tools > Board menu.
Code for the ESP8266 server
#include <ESP8266WiFi.h>
#include <WiFiClient.h>
#include <ESP8266WebServer.h>
#include <ESP8266mDNS.h>

const char* ssid = "YourWifiName";
const char* password = "YourWifiPassword";

void HandleRoot();
void HandleCommand();
void FlashLeds();
void TurnOffLeds();
void HandleNotFound();


ESP8266WebServer server(80);

// what to do when a client requests "http://<IP>"
void HandleRoot() {
    server.send(200, "text/plain", "hello from esp8266!");
}

// What to do when a client requests "http://<IP>/command"
// This function doesn't care whether it is a GET or POST at the moment,
// it will treat them the same just to make things easier.
void HandleCommand() {
    for (uint8_t i=0; i<server.args(); i++) {
        if (server.argName(i) == "flash") {
            if (server.arg(i) == "on") {
                FlashLeds();
                server.send(200, "text/plain", "LEDs turned on");
            } else {
                TurnOffLeds();
                server.send(200, "text/plain", "LEDs turned off");
            }
        }
    }
    server.send(404, "text/plain", "Command not found");
}

void FlashLeds() {
    // Flash LEDs or something then exit this func so that the webserver carries on running.
    Serial.println("LEDs on.");
}

void TurnOffLeds() {
    // Flash LEDs or something then exit this func so that the webserver carries on running.
    Serial.println("LEDs off.");
}

// If the route is not found then default to printing out what was sent to this server to aid in debug.
void HandleNotFound() {
    String message = "File Not Found\n\n";
    message += "URI: ";
    message += server.uri();
    message += "\nMethod: ";
    message += (server.method() == HTTP_GET)?"GET":"POST";
    message += "\nArguments: ";
    message += server.args();
    message += "\n";
    for (uint8_t i=0; i<server.args(); i++) {
        message += " " + server.argName(i) + ": " + server.arg(i) + "\n";
    }
    server.send(404, "text/plain", message);}

void setup(void) {
    Serial.begin(115200);
    WiFi.begin(ssid, password);
    Serial.println("Setting up.");

    // Wait for connection
    while (WiFi.status() != WL_CONNECTED) {
        delay(500);
        Serial.print(".");
    }
    Serial.println(".");
    Serial.print("Connected to ");
    Serial.println(ssid);
    Serial.print("IP address: ");
    Serial.println(WiFi.localIP());

    if (MDNS.begin("esp8266")) {
        Serial.println("MDNS responder started");
    }

    /*
    //I left this in commented out just to show this method as well.
    server.on("/inline", []() {
        server.send(200, "text/plain", "this works as well");
    });
    */

    // Setup server routes.
    server.on("/", HandleRoot);
    server.on("/command", HandleCommand);
    server.onNotFound(HandleNotFound);
    server.begin();
    Serial.println("HTTP server started");
}

void loop(void) {
    server.handleClient();
}
Code for webpage to send commands
The below code can be copied and pasted into a text file and then save the file as yourfilename.html, it will allow you to send commands to the module / server.
The IP address of my module is 192.168.1.115 so make sure you replace that IP in the below code with the one of your module.
Also note that you could actually serve this page straight from the module itself and not have separate file.
<head>
    <!--<script src="jquery.js"></script>-->
    <script src="http://code.jquery.com/jquery-2.2.1.min.js "></script>

 <script>
    $(function () {

    // Bind the click of the button to the function that posts data to the server.
    $('#buttonFlashOn').click( function() {
        $.post("http://192.168.1.115/command", { flash : "on"})
         .done(function( data ) {
             //alert( "Data returned: " + data );
        });
    });

    // bind the click of the button to the function that posts data to the server.
    $('#buttonFlashOff').click( function() {
        $.post("http://192.168.1.115/command", { flash : "off"})
         .done(function( data ) {
            //alert( "Data returned: " + data );
          });
    });

});
</script>


</head>

<body>
 <br/>
 <button id="buttonFlashOn">Flash on</button>
 <br/>
 <br/>
 <button id="buttonFlashOff">Flash off</button>
 <br/>
</body>
enjoy 🙂
Thank you very much! This is the only sample code ( I could find) that runs ok on my nodeMCU 0.9 , without any errors .