A DC motor is a DC motor…. right? No, it’s not always that simple.
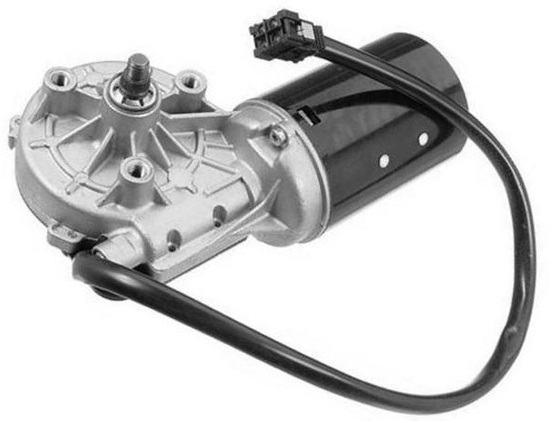
Windscreen wiper motors are fairly cheap when bought second hand from a scrap yard (where I got mine from) and give very good torque for larger robotics projects. You’ve just got to be aware of a couple of things before getting started.
How they’re wired
Firstly there are only really 2 wires, mine were green and red so I’ll name them that from now on. Each of my motors look a bit like this:
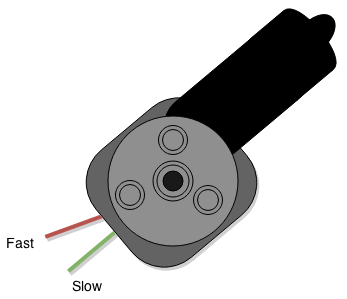
Notice how I’ve labelled them slow and fast. If you’d assumed that red was positive and green was ground then you’d be making the same mistake as I did.
Allow me a very short tangent to explain why neither of the only two wires coming from my motor are ground.
If you were to jump start a car you’d put the +ve lead on your car battery +ve and your -ve (gnd) lead onto a bit of the engine or chassis and not the -ve terminal of the battery. This is because the chassis of the car is actually it’s ground. Now if we take this knowledge and apply it to our motors we stand a better chance of figuring out how to wire them.
It turns out that the case of the motor is ground and the 2 other wires, red and green, are the two +ve wires that energise different amounts of the coil windings and thus producing different speeds. So your motor wiring looks something like this:
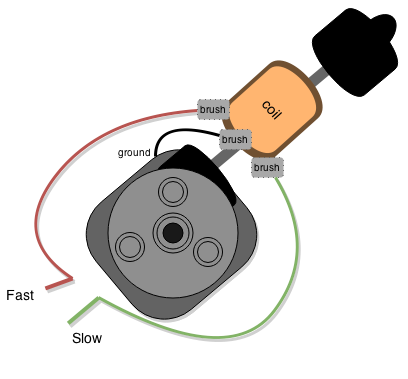
Having the case of the motor as active ground isn’t great for our robots. Two of my motors where mounted on a aluminium chassis and when I engerised one motor the other motor would drive as well, not good.
Modification
So these motors require a small modification to play nice. What we need to do is cut the connection from the ground brush to the casing and then move one of the wires (red or green) to the ground brush. It is important that you choose which wire you want to use to drive the motor as they operate it at different speeds and currents. If you apply 12v across each pair of brushes the results are:
(good) gnd & green = slow, ~1.2A
(good) gnd & red = fast, ~2.4A
(bad) red & green = very fast, ~7.2A
For my robot I have changed the internal wiring so that:
- The case is no longer ground
- Green is ground
- Red is positive
Which results in a moderate / slow speed at ~1.2A
Summary
Green = slow
Red = fast
3 brushes – gnd, red, green
Casing is connected to gnd brush and should be disconnected