I found a good set of Arduino pinouts created at www.pighixxx.com, thanks pighixxx!
Enjoy!
I found a good set of Arduino pinouts created at www.pighixxx.com, thanks pighixxx!
Enjoy!
I wanted a page that would list all my posts, a site index basically. I tried a simple method and it was close but not what I wanted, it did not dynamically put the list of posts inside the content area of a page, so it looked very odd.
So here is a way to get your “All Posts” looking how it should on your WordPress site.
Example: http://tripsintech.com/all-posts/
Make sure you are using a child theme on your WordPress site.
( You don’t have to do this but if you don’t use a child theme then when you update your theme then anything you do next will just be overwritten )
Create a page template. To do this create a php file in your active theme directory, mine is here:
“…/wp-content/themes/twentyfifteen-child/AllPostTemplate.php”
Now paste in the below code into your AllPostTemplate.php file and save it.
<?php
/*
Template Name: All posts
*/
get_header(); ?>
 <div id="primary" class="content-area">
 <main id="main" class="site-main" role="main">

 <?php
 // Include the page content template.
 get_template_part( 'content', 'page' );

 $first = 0; //The first article to be displayed
 while(have_posts()) : the_post();
 ?>
<script>
 var x = document.getElementsByClassName("entry-content");
 if (x[0] != null) {
 x[0].innerHTML = "<ul> <?php $myposts = get_posts('numberposts=-1&offset=$first'); foreach($myposts as $post) : ?><li><?php the_time('d/m/Y') ?>: <a href='<?php the_permalink(); ?>'><?php the_title(); ?></a> </li><?php endforeach; ?></ul> <?php endwhile; ?>";
 }
</script>

 </main><!-- .site-main -->
 </div><!-- .content-area -->

<?php get_footer(); ?>
Now we need to actually create the all posts page, this is very simple and is done through the WordPress dashboard.
Go to pages, then create a new page and change the Page Template from default (or whatever else it is) to be “All posts”.
All done!
NB: This template has only been tested with the TwentyFifteen Theme, it should work for most though.
Edit 25/4/2016:
There is a plugin for SDR sharp that now does a lot of this process for you and is all together a lot quicker. The SDR plugin way of doing it is less robust as I’ve compared both methods multiple times but the time savings are probably worth it. Here is an article to get you started.

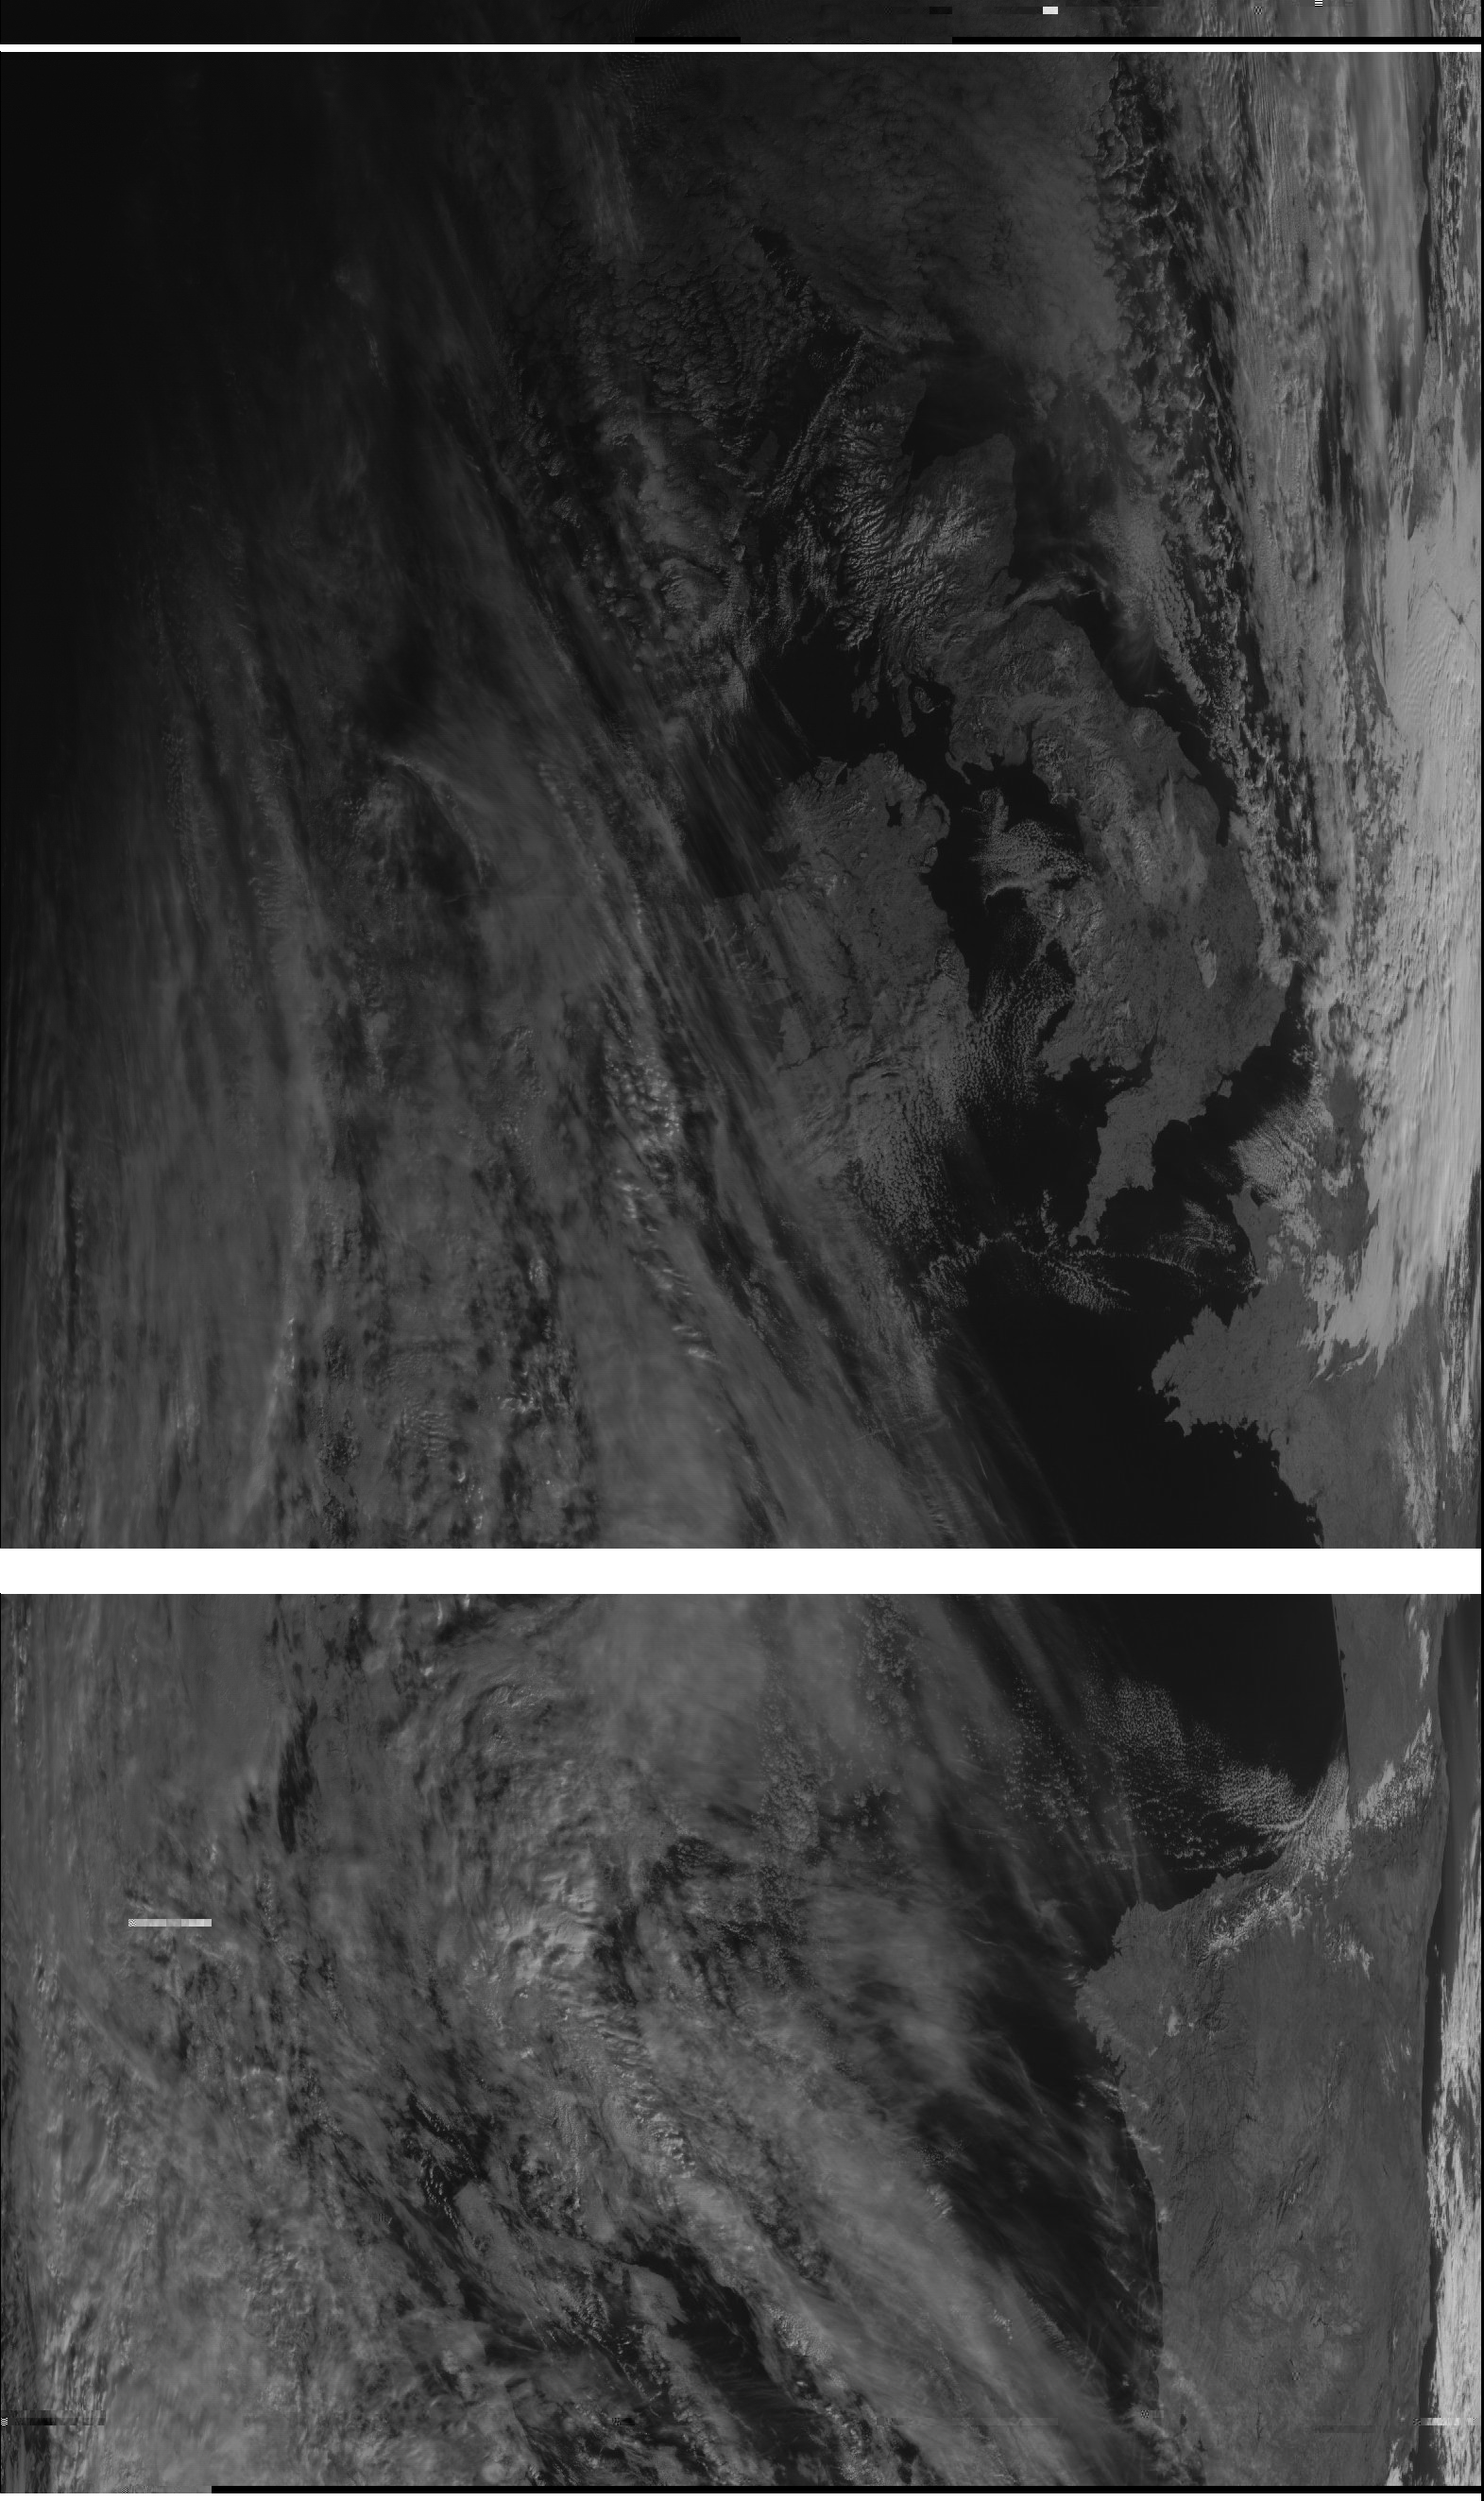
Above is a cropped image from the Meteor-M N2 polar orbiting Russian weather satellite that was launched on 8th July 2014. From this satellite we can freely acquire Low Resolution Picture Transmission (LRPT) images.


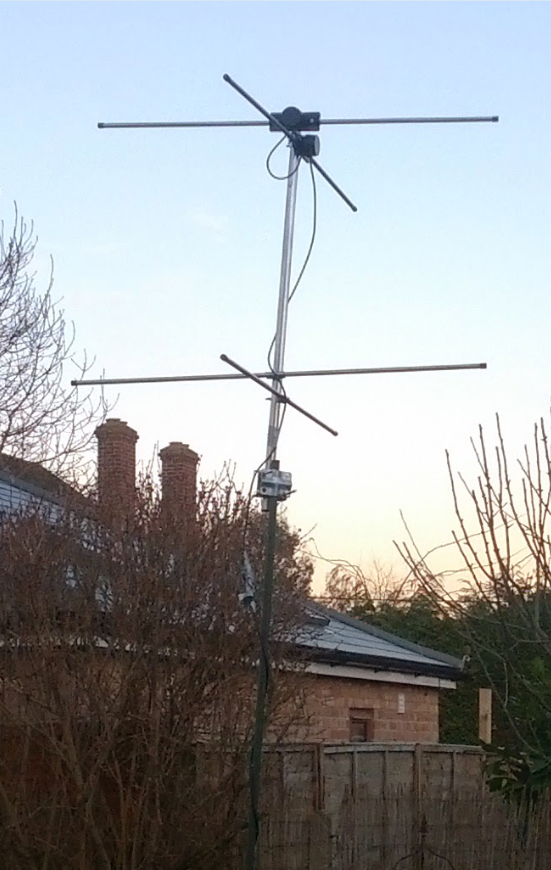
Setup your hardware. Put the aerial in a suitable location, outside away from metal structures is probably best. If not using a TV aerial with built-in amplifier then connect up the aerial to the first low noise pre-amp and then connect the output of the pre-amp to the input of your higher gain amplifier.
Attach your SDR USB dongle to the output of your amplifier and plug it into the a USB slot.
Everything is now wired up and ready for you to install and setup all the software.
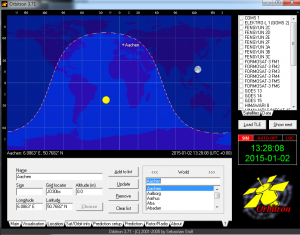
Orbitron is the software which will allow us to track the satellites and know then they are close enough for us to hear them with our receiver.
Install Orbitron by downloading it and running the file.
We now need to setup Orbirton to get the correct Kepler elements needed to track the satellites.
Setup Orbitron by following these steps.
Set your location:
Find the menu button which is hidden away at the top right, circled in red in this image:
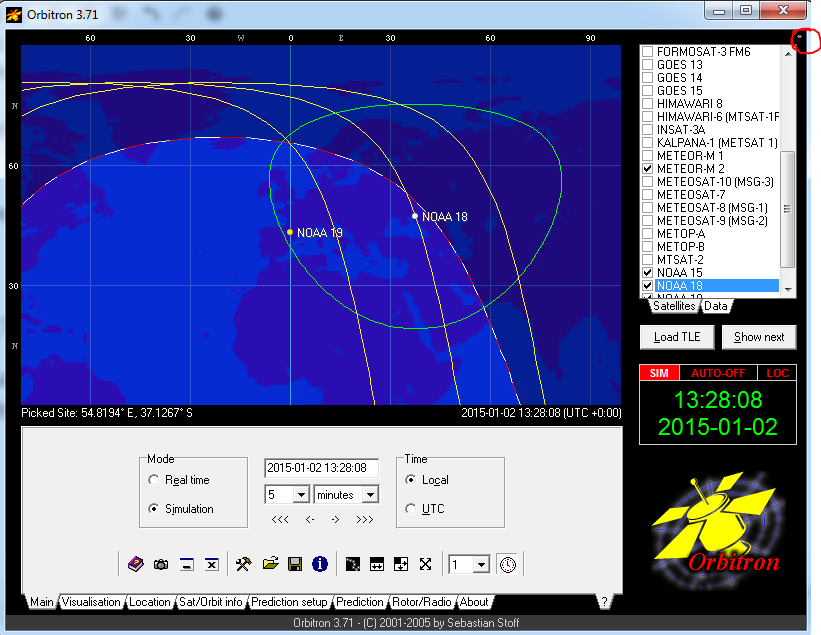
Click it and choose AutoUpdate TLE, click ok and let it update all the .txt files containing the orbital elements.
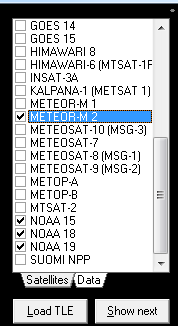
Click the menu again and choose load TLE, select Weather.txt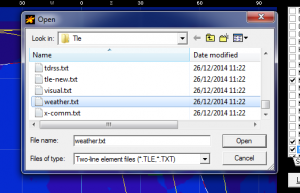
Now you will see a list of satellites on the right hand side. Tick the ones you want to see in this case we’re interested in Meteor M2. (you may also want to acquire the NOAA satellites too, they’re easier to get but lower resolution)
Download it and follow the installer.
Both LRPTRx and LRPTofflineDecoder do not require installation, they can just be run BUT MUST BE RUN AS ADMINISTRATOR. (right click run as administrator, or set it permanently in the compatibility tab under properties)
EDIT: If your SDR# (sharp) download did not come with the zadig.exe file then you can download it from here: http://zadig.akeo.ie/
Download SDR sharp and run the batch file in a CMD running as admin.
This will download the files needed for SDR Sharp to run.
Ensure the SDR dongle is plugged in and follow below to setup the SDR USB driver.
You must first run \sdr-install\sdrsharp\zadig.exe, again this must run as admin.
Select Options > List All Devices:

Select Bulk-In interface 0:
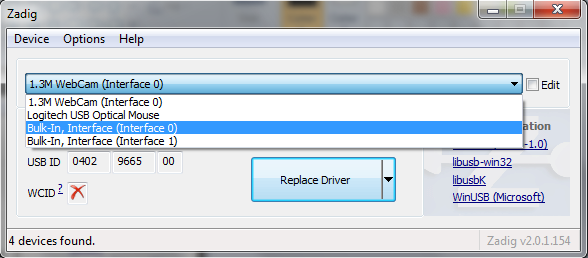
Choose WinUSB in the box to the right of the green arrow:
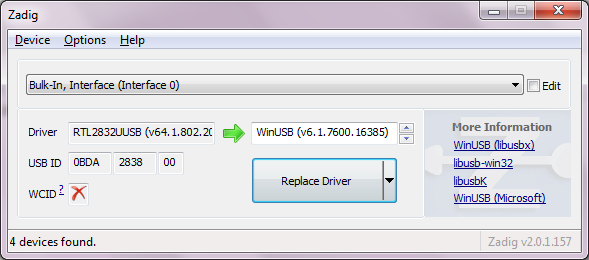
Click Replace Driver.
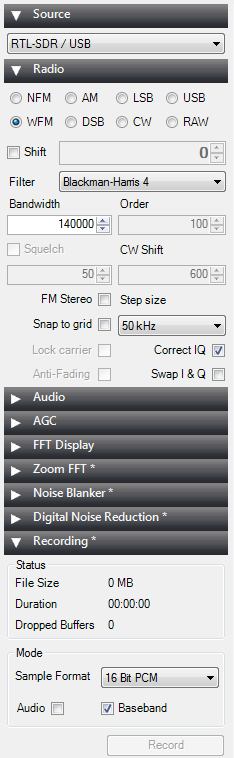
Now, start up SDRSharp.exe and select RTL-SDR / USB in the source drop down.
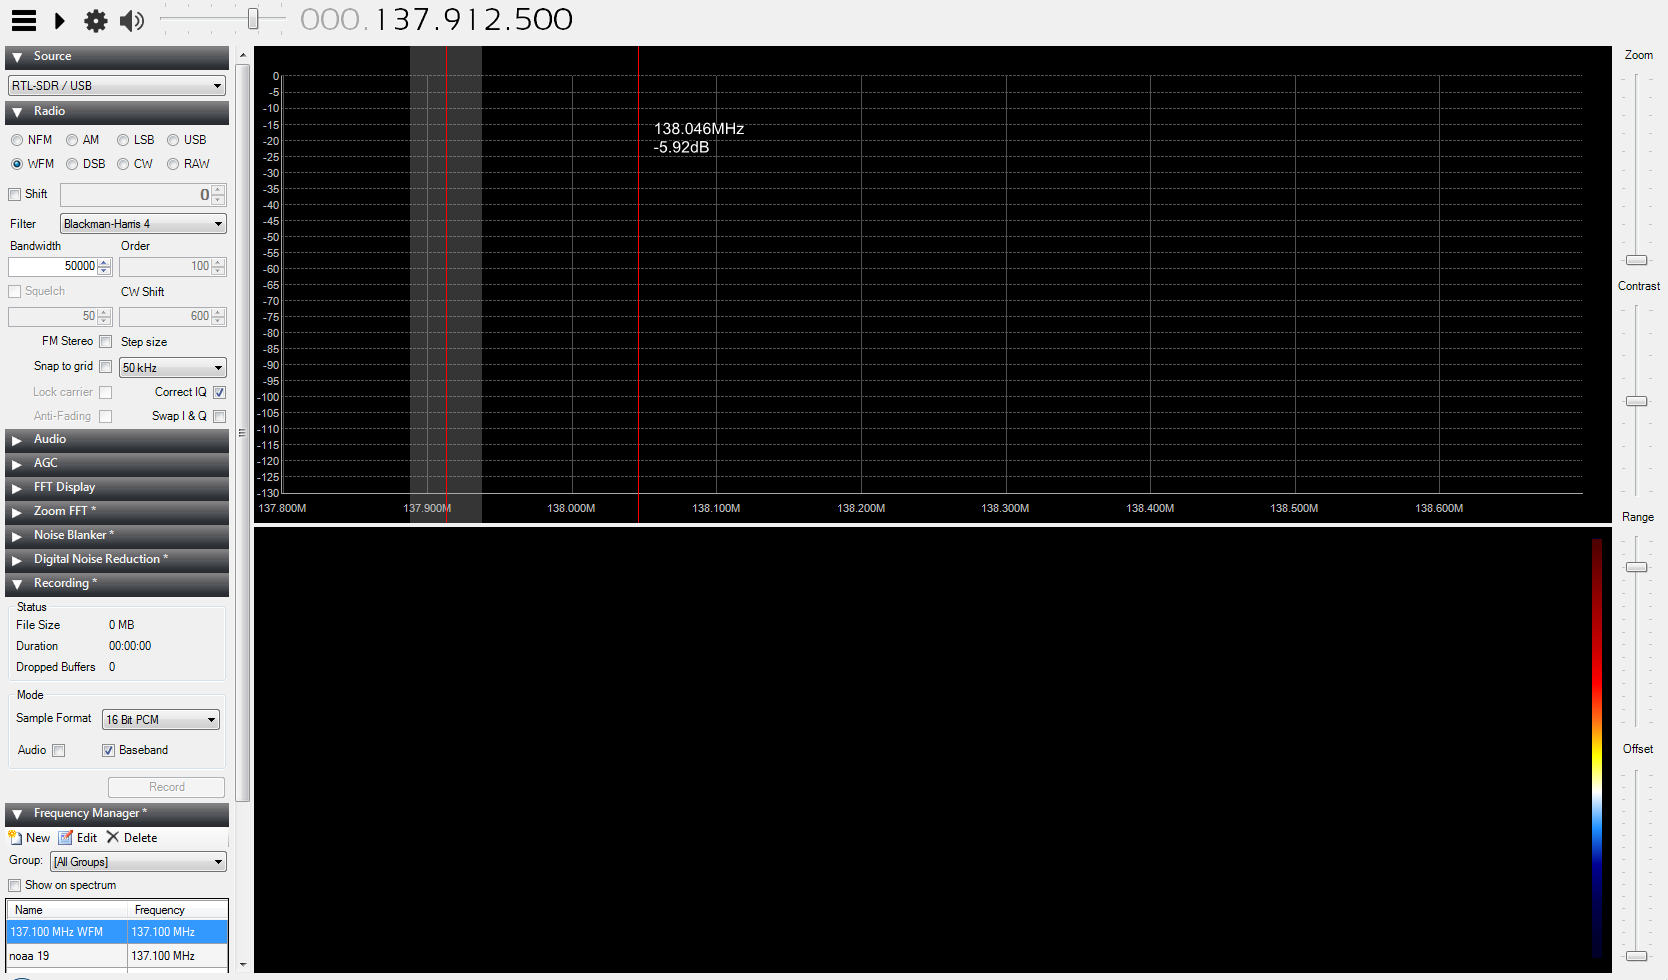
We also want to make sure other settings are correct.
Correct IQ should be checked
WFM (Wideband FM) should be selected
Bandwidth should be set to ~140000Hz
Recording LRPT signals requires that we select Baseband in the recording tab, not just the audio like we do with NOAA satellites.
The last part of the SDR setup is to set our frequency.
The Meteor M2 satellite is transmitting on two frequencies, we will be listening to the signal on 137.1MHz. So set your SDR sharp frequency to that.
![]()
Note: you may also need to increase your gain in SDR Sharp under the cog menu icon, mine is set to ~30db but this is something that will differ for every setup and should be tweaked to what looks good for you, i.e. increase the gain until the signal noise is increasing at the same rate.
So things start to get a little more interesting now. Once you click the run arrow icon you should start to see a spectrum of signals and noise in SDR Sharp.
![]()
Make sure the satellite is going over / close to your location.
( Look at the yellow circles on Orbitron to see when it will be in range, it will probably be a fair amount smaller than the circles in Orbitron in reality, depending on your aerial.)
You should then start to see a signal peak around 137.1MHz as shown below:
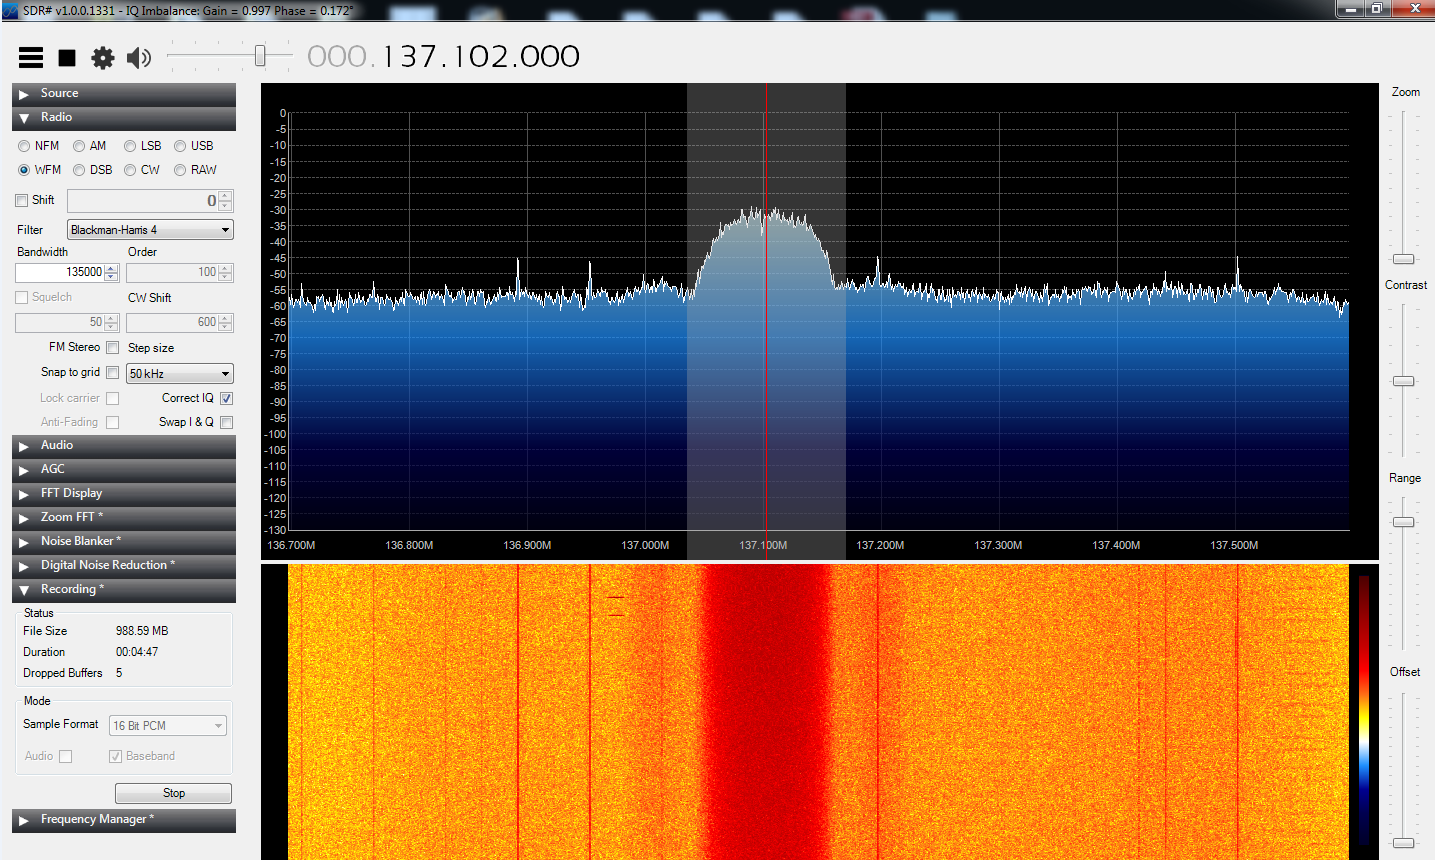
Make sure to click record! (baseband only for LRPT which is used on Meteor M2)
Find the file that was saved, usually saved in the same directory as the SDRSharp.exe you ran.
Open the .wav in audacity.
Change the project sample rate (bottom left) to be 140000Hz
Amplify (effects->amplify) the signal only if needed. The amplitude during the main signal should be approximately 2/3 of the maximum.

Then export the audio (File > Export audio) and save it somewhere.
The next part of preprocessing the file is done by using LrptRx.exe (running as admin or else it will fail to write any files)
Open the file you exported from audacity with the LrptRx.exe application.
Check swap I/Q
Click run and eventually you should see the green dots in the 4 quadrant graph start to make 4 distinct constellations:
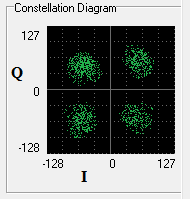
Let LrptRx.exe run until the progress bar in the middle gets to the end but beware it will not stop automatically so manually stop it near or at the end, no idea why the author did not make it auto stop, sigh.
Now find the output file generated by LrptRx.exe and start up LRPToffLineDecoder.exe as admin.
Tick the ignore RS check box.
Click the 72k button and open your .raw file, your image should slowly start to appear.
To save the image change the RGB drop downs to all match the column you want to save, e.g. set all to 3.5 – 4.1
Then click generate and save the image, below is my first ever M2 image, a bit broken up but not bad! Please do feel free to share yours here too, i’d like to see them.
Phew, that’s a lot of work but it’s worth it for the unique images we can get.
I will be investigating other ways to process the files as this method is very time consuming and requires many manual steps. Once I have an automated way of doing this with either the same or different software I will definitely post my method.
EDIT: Faster method
As I’ve recently done this myself and it wasn’t as straight forward as wordpress say it is here are a few things which may be of use to someone.
I’m assuming that:
Backup your site (Database and files)
Copy all your files from your ‘olddomain.com’ directory to your ‘newdomain.com’ directory
Go to your settings->general section of your new wordpress site e.g ‘newdomain.com/wp-admin/options-general.php’
Update both the fields for ‘WordPress Address’ and ‘Site Address’ to be ‘http://newdomain.com’
By now your site will almost be working but some images and other media will not be working.
We need to change values in the database to stop them pointing to ‘olddomain.com’ for images as once you delete your old site files they will obvisouly not be accessible. You can do this manually or use this plugin I found that works well.
Go to your Plugins section and install the plugin: ‘Search & Replace’ the summary is: “A simple search to find strings in your database and replace those strings.”
Now go to tools and select ‘Search & Replace’ and select ‘Search and replace’ and enter your old domain in the ‘search for’ and your new domain in the ‘replace with’: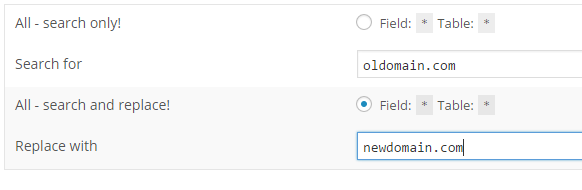
Click go and you should be done.
Hope that helped someone out there!
Things might be a bit weird as I’ve just moved from my old domain to this one: TripsInTech.com so hopefully the move went ok, perhaps I’ll post a how to on that 🙂
Edit: I did, here!
I’ve been using the Arduino Mega 2560 recently for my robotics project and after getting a fair way through some code I found that I started to receive this error:
relocation truncated to fit: R_AVR_13_PCREL
It turns out there is a bug in the arduino IDE or at least the compiler it uses. The solution was to Download the Beta Arduino IDE which has the bug fixed in it.
That fixed it for me. Happy tinkering.
For anyone that is interested: I think that the bug was due to a compiler flag or config error which disabled the option for the compiler to use long jumps. So as your code grows you gradually fill more memory and the device cannot use its short (more efficient) jump instructions to move around memory as you have now used more than 4kB which I believe is the limit of the short jump instruction on those chips.
This may be old news (about a month old) but I had not heard about it until a friend pointed it out to me.
It looks like Microsoft will, after some mentions of it in early 2014, be ‘open source-ing’ .Net and making official builds of the runtime for Linux and OSX. In my opinion this is great news. .Net (C# in particular) has been by far the most productive language I have ever used; .Net has an abundance of officially supported libraries that make your coding life so much better.
Hopefully the guys over at Mono will be hired to oversee the porting of the official builds as they’ve done a great job so far of creating unofficial ports to other OSs.
It will be a while before we see anything materialise but at least Microsoft have now publicly announced it.
source: .Net for Linux and Mac OSX
It’s 2015 and I intend to use this year to get a lot of projects finished!
Happy new year and, as always, be awesome to each other.